Handling Wet Sourdough Without the Mess
High-hydration dough is the secret to beautiful, airy loaves with a tender, custard-like crumb. Don’t let wet dough intimidate you; with smart techniques, you can build strength effortlessly.
Infographic
Click the image to zoom, or download it.
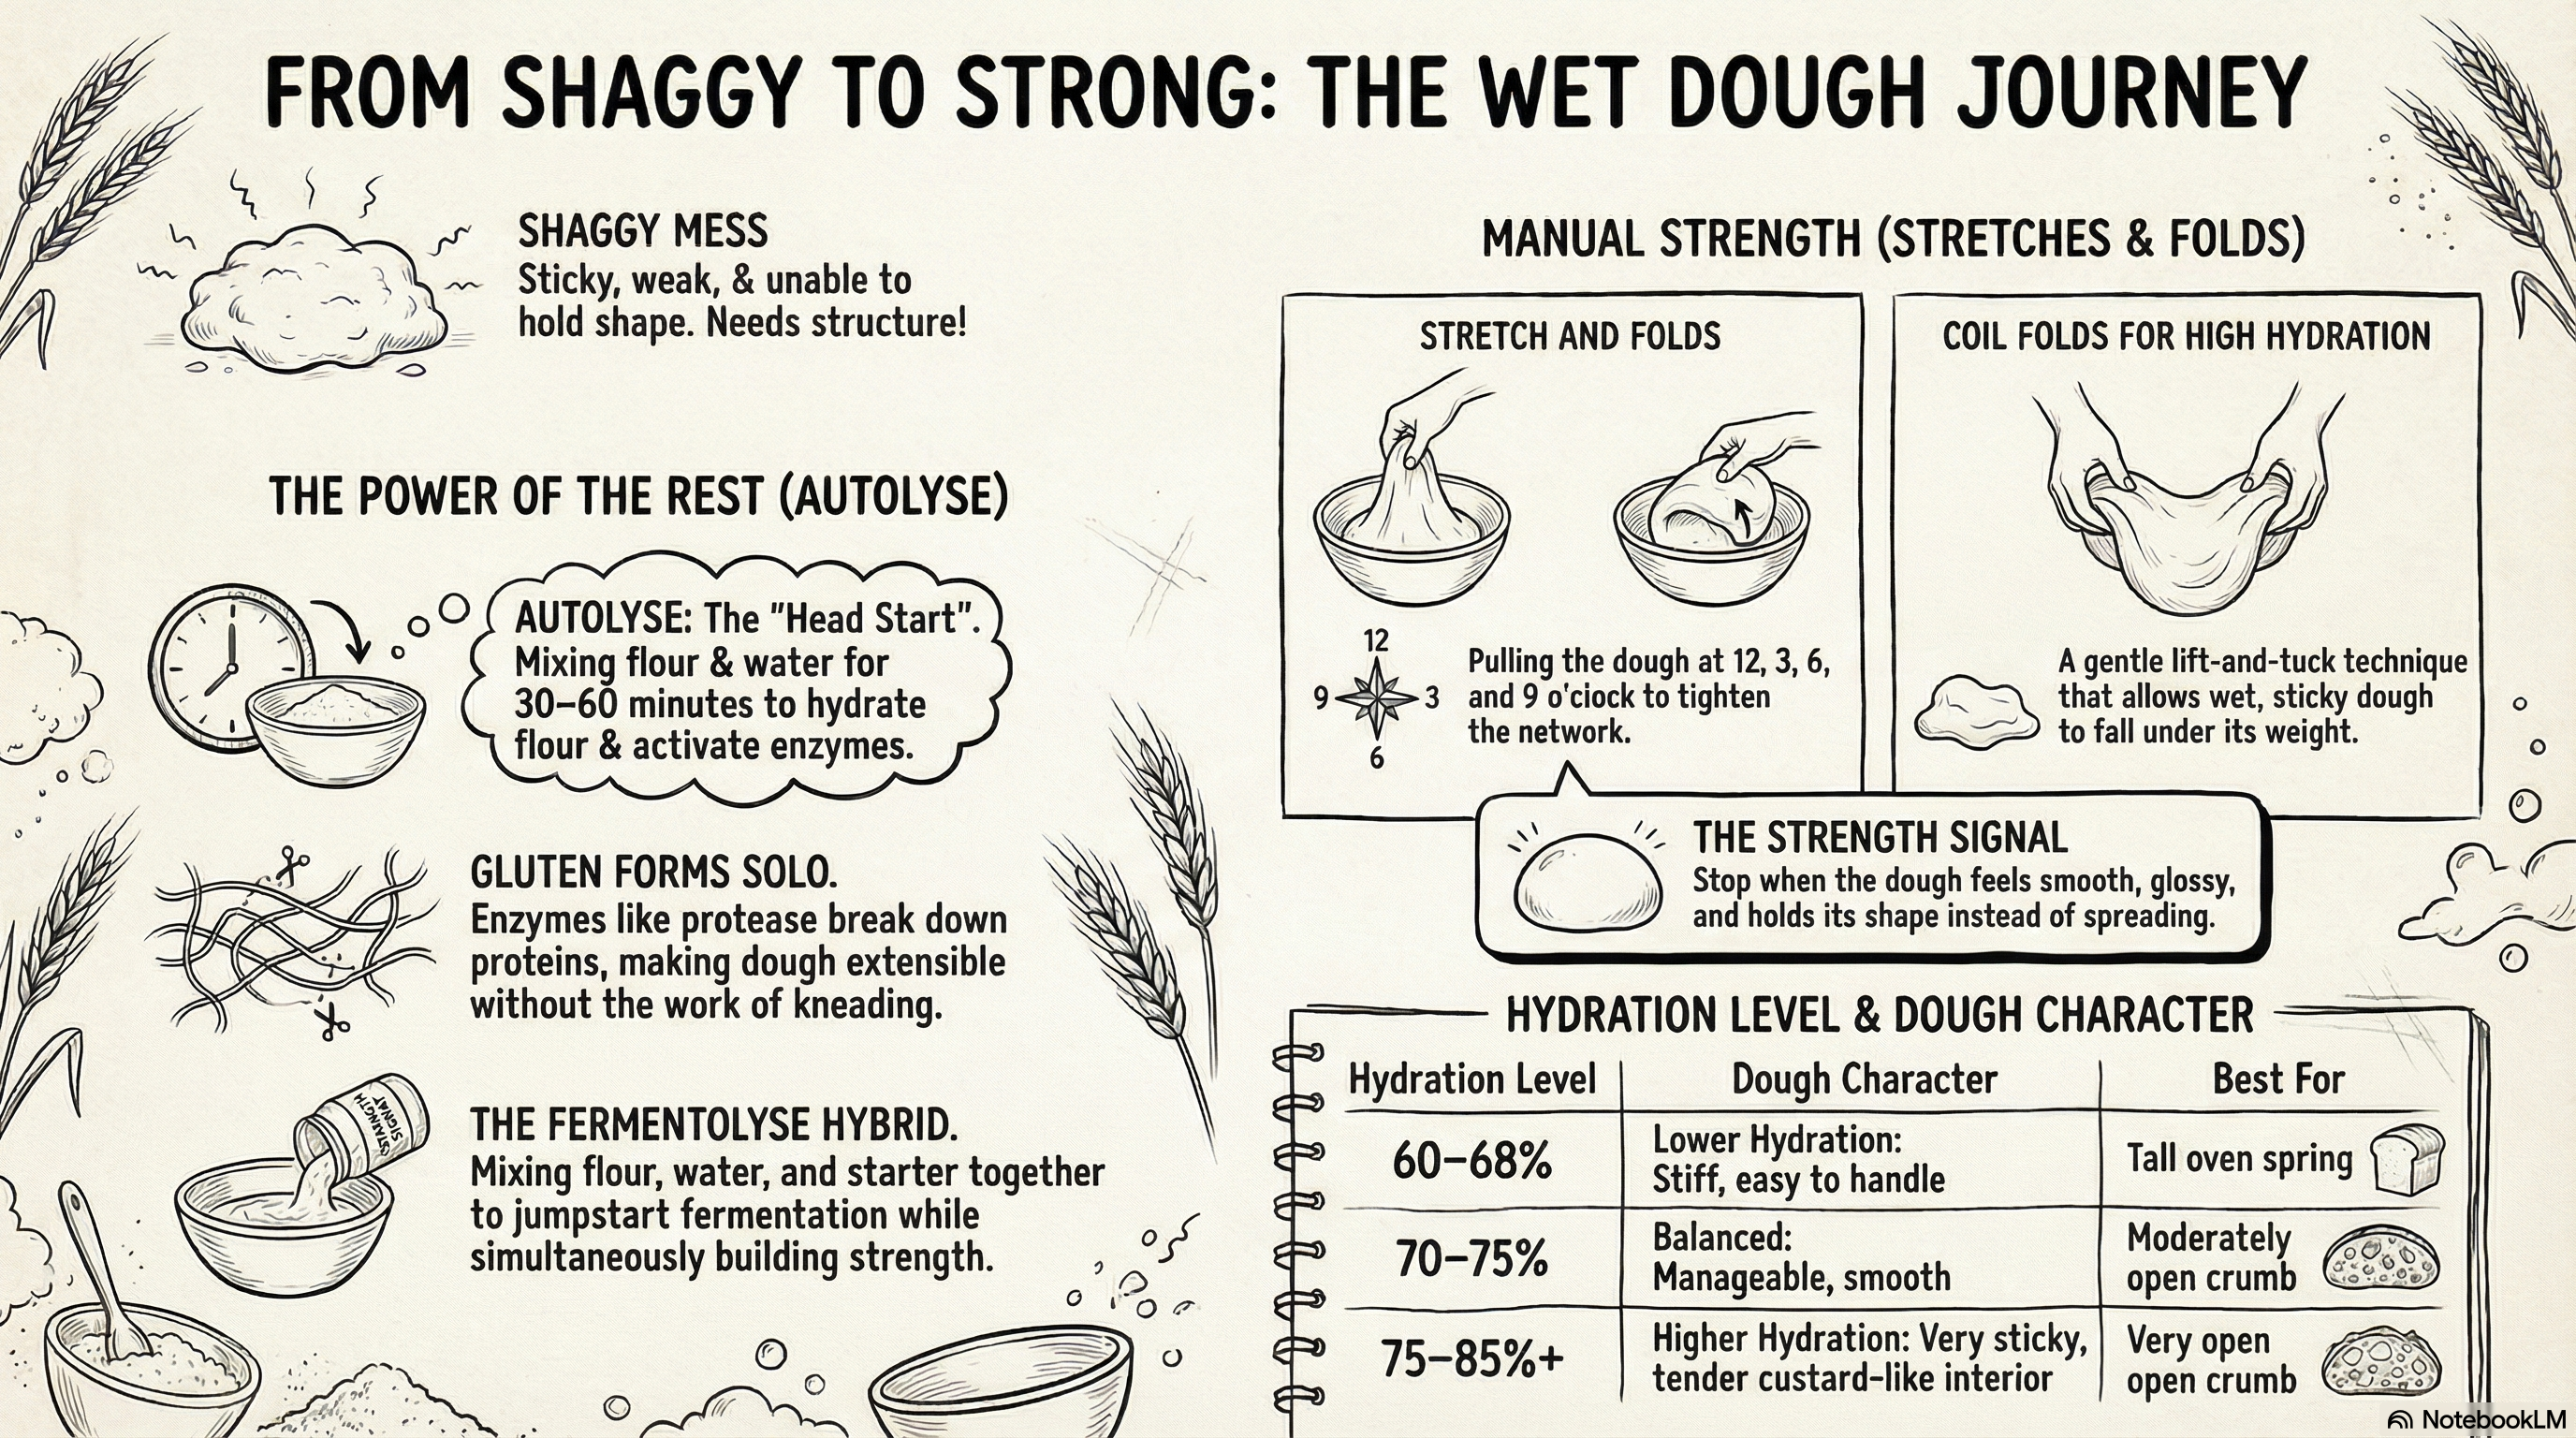
5 Steps to Master Wet Dough
1. Choose the right flour
Use strong bread flour (12-14% protein) to build a superior gluten network.
2. Hold back water (Bassinage)
Reserve 10-20% of the water and mix it in near the end of kneading to build better initial tension.
3. Autolyse over fermentolyse
Mix flour and water for 30-60 minutes before adding starter. Pure autolyse prevents wet doughs from becoming too slack early on.
4. Wet hands, not flour
Keep a bowl of water nearby to prevent sticking without altering the dough's hydration.
5. Build strength with Coil Folds
Gently lift the dough from the middle and let it fold under its own weight to build tension effectively.
Common Pitfalls
Adding extra flour
Resist the urge! This throws off the recipe’s carefully calculated baker's percentages.
Moving too slowly
Hesitation leads to sticking. Use quick, confident motions.
Waiting for a "double" rise
Overproofing wet dough leads to a soupy, unmanageable mess.
Pro Tip
Cold proofing: An overnight rest in the fridge firms up the dough for perfect scoring.
Control rise by temperature: Stop bulk fermentation at 30-35% rise for warm doughs (80°F / 27°C) and 55-60% for cooler doughs (70°F / 21°C).